When I think about preparedness and survival, I think about the primary priorities in order like this: Shelter, Water, Food and Security. The secondary priorities, once you've handled those first four, go like this: Medical, Intelligence, Communications and Transportation. I'm going to give you some plans for a simple way to start a rainwater collection system to allow you to check your water needs off the list. Try to remember as a starting rule that your survival group is going to need to plan for water usage to the tune of one gallon of water per person, per day. Sometimes this will obviously include some adjustments up and down for different cooking needs, sanitation, medical, etc., but generally speaking, that rule is a good starting point.
Before we start, also take into consideration your local water sources. I personally live in a very riverine area, though I'm not right on the water. So as long as I've done well for myself with transportation, that might be a good option for collecting water. However, I've also got a pretty reliable rainfall pattern (or so I say, as we are currently experiencing our first night of rain in eight weeks). Some of us can often count on decent rainfall, but it would behoove you to store water in the largest amount you can for those weeks (or months) when rain is scarce.
This type of simple system will allow you to funnel rainwater into your reservoir, and also collect from other sources and deposit it in the reservoir yourself. When it's time to use it, or if you want to drain it into smaller ready-to-use jugs or bottles, it'll need to be filtered/purified. My unpaid recommendation is to use a Berkey water filter for that, simply because the "black" filters that company uses are able to filter a very large amount of water before they need to be replaced. Simply take the water from your collection system, pour it through a Berkey or some similar filtration system, and it'll be ready to drink. Without filtering, the water can be used for garden irrigation, pets, possibly even hygiene.
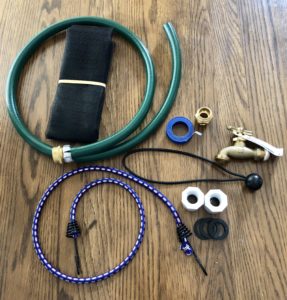
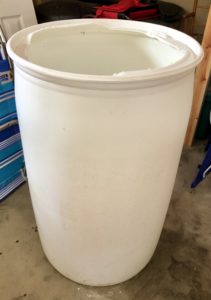
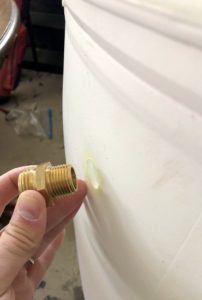
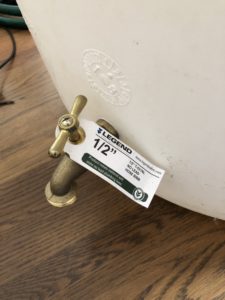
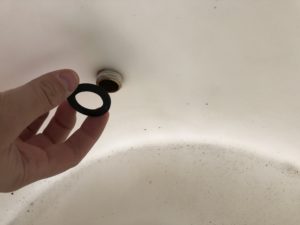
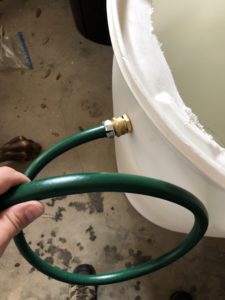
Below you'll see the parts you'll for this simple build laid out on our table. There we have a 1/2" metal hose adaptor and a 1/2" spigot. You'll need two PVC bushings to go onto those and a pair of rubber washers, one for each bushing. Get some Teflon tape to wrap the metal threads of the hose adaptor and spigot. Get a length of garden hose to attach to the hose adaptor later as an overflow valve. I have some black plastic mesh screen and a couple of bungee cords to make a top screen. Use a power drill and a 13/16 spade bit for drilling holes in the barrel. My barrel I'm using is a food grade 55 gallon barrel that I'm told contained Mountain Dew before it came to me. Some sources will have the top cut off for you, but you can use a jig saw or a saws-all to remove if you need to. I advise using food grade plastic rather than something that could rust. Lastly, you need a short length of garden hose, at least three feet, and make sure it's still got the attachment on one end.
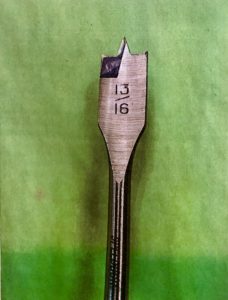
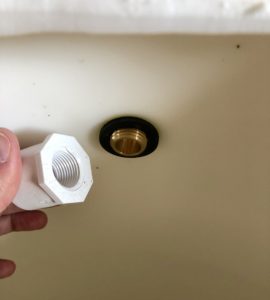
Use your drill bit to drill out two holes in the barrel. One hole needs to near the bottom, which is where the spigot will eventually go. Three inches from the bottom should be ok, but don't go too much higher. You don't want to lose access to several inches of water in the bottom. The next hole needs to be near the top, offset at least 90 degrees from the bottom hole. This will be your overflow outlet, hopefully overflowing into another container via the hose you'll attach later. It needs to be offset because we will assume that you will eventually pair this barrel with a second one catching your first barrel's overflow, and you don't want it blocking the spigot below.
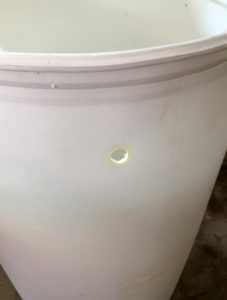
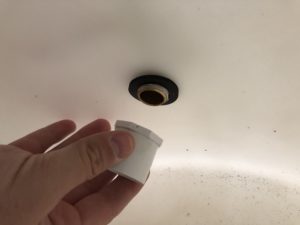
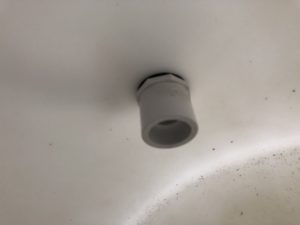
With the only section of this project that I would call "work" behind you, you're ready to attach your pieces. Get your Teflon tape and wrap the threads on the narrower end of the hose adaptor, the threads that are going inside the barrel. Take your hose adaptor and push that side through your top drilled hole. If the hole is tight, you might have to screw it in. Reapply Teflon tape if you have to. On the inside, place a rubber washer and then screw the PVC bushing onto the metal adaptor.
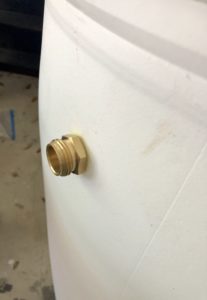
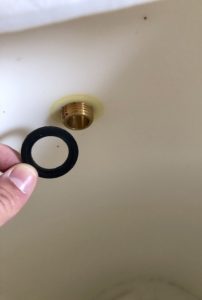
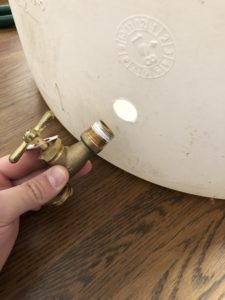
You'll follow the same process for the spigot at the bottom. Wrap the metal threads with Teflon tape and push the spigot into the hole. You may need to screw the spigot in if the hole is a tight fit, and if so, make sure the Teflon tape is still in place afterward. Position a rubber washer on the inside and screw the bushing into place.
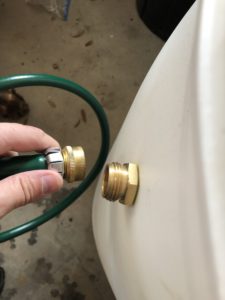
Take your overflow hose and attach it to the hose adaptor you installed at the top. This hose will drain water into a second container when this container is full.
Secure the mesh screen around the top of the barrel using your bungee cords. You'll need to purify this water coming out before drinking it anyway, but this mesh can prevent leaves, sticks and some bugs or animals from getting inside.
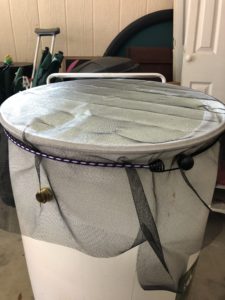
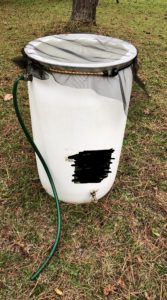
Here is your finished product!
Some notes:
Once you get the system built, fill the barrel all the way up to the overflow hose and let it run out for a few minutes. You're checking for leaks, especially at the bottom around the spigot. That kind of water pressure is likely to cause a leak in that bottom area, so then drain the barrel and take some silicon, caulk or other sealant and seal the leak on the inside and outside. Your overflow hose attachment isn't nearly as likely to leak, nor will it matter as much if it does. There is much less pressure at the top hole than at the bottom. Once your sealant has dried, fill the barrel again and look for leaks.
It's advisable to place your barrel in an elevated position, such as on top of a wooden platform. This allows gravity to work for you and gives space to place a large bucket or tub under the spigot. If you ask me, you need to be able to put a five gallon bucket under the spigot, at least.
Speaking of elevated platforms... If you build one, remember that a gallon of water weighs about 8.3 pounds. When your 55 gallon barrel is full, it'll weigh over 460 pounds, container, parts, water and all. Platforms need to be very strong and stable. My kids play outside, don't yours? Don't make a mistake.
Funnel water from a roof! 500 square feet of roof can funnel 115 gallons of water from just one-half inch of rainfall. That'll fill both your barrel and your overflow barrel if you started empty.
Don't funnel water into your barrel from a shingled roof. These roofs contain contaminants that are extremely difficult to filter out. Try a metal roof or some corrugated plastic sheeting instead, it'll be easier and cheaper than trying to arrange a way to filter out the stuff that shingles will dump into the water. Build yourself a greenhouse from hard plastic and funnel from that.
If your yard has a slope, position your barrels at the higher end if possible. Again, gravity can work in your favor.
Check your local laws. Some municipalities have people in positions of authority who may not respect your right to collect water. Arrange your barrels legally.
No comments:
Post a Comment